
T4 Thermostat Installation Manual: A Comprehensive Guide (Updated 04/22/2026)
Welcome! This comprehensive manual, dated today – 04/22/2026 at 11:22:16, will guide you through a smooth Honeywell T4 thermostat installation process.
Congratulations on choosing the Honeywell T4 Thermostat! This smart thermostat is designed to provide optimal home comfort while maximizing energy efficiency. The T4 offers intuitive controls, remote access via a mobile app, and compatibility with popular smart home platforms like Alexa and Google Assistant.
This thermostat isn’t just about temperature control; it learns your habits and preferences to create a personalized heating and cooling schedule. Its sleek design seamlessly integrates into any home décor. This manual, updated on 04/22/2026, provides a step-by-step guide to ensure a successful installation and setup. We’ll cover everything from identifying your existing wiring to connecting to your home’s Wi-Fi network. Prepare to experience a new level of comfort and control with your Honeywell T4!
Package Contents & Verification
Before you begin the installation process, carefully verify the contents of your Honeywell T4 Thermostat package. You should find the following items: the T4 Thermostat display unit, a T4 thermostat base plate, mounting screws and wall anchors, wire labels, a screwdriver, and this comprehensive installation manual (updated 04/22/2026).
Crucially, inspect each component for any signs of damage during shipping. If any parts are missing or appear damaged, do not proceed with the installation. Contact Honeywell support immediately for assistance and replacements. Retain the original packaging for potential returns or warranty claims. Accurate verification now prevents delays and ensures a smooth, trouble-free installation experience. A complete package is the first step to enjoying your new smart thermostat!
Safety Precautions Before Installation
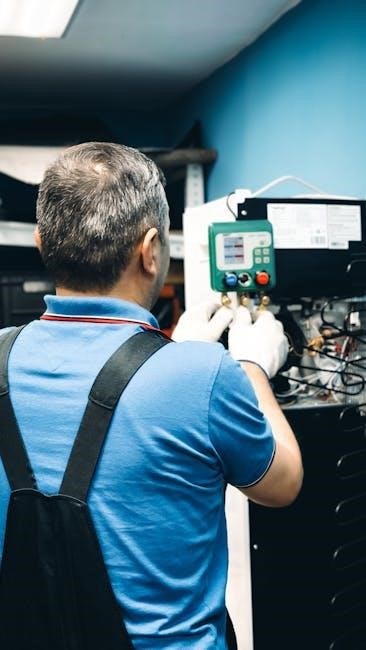
Prioritize safety! Before commencing any work on your HVAC system, absolutely disconnect power to the system at the breaker box. Failure to do so presents a serious risk of electrical shock or damage to your equipment. This is non-negotiable. If you are uncomfortable working with electrical wiring, consult a qualified HVAC technician;
Additionally, be mindful of potential asbestos in older homes, particularly around existing thermostat wiring. Avoid disturbing any insulation that may contain asbestos. Wear appropriate safety glasses and gloves during installation. Keep small parts away from children. Always follow local electrical codes and regulations. Your safety and the proper functioning of your system are paramount.
Tools Required for Installation
Preparation is key! To ensure a smooth T4 thermostat installation, gather the following tools beforehand. You will need a Phillips head screwdriver – both standard and stubby – for accessing and securing wiring. A flathead screwdriver may also be useful. A wire stripper/cutter is essential for preparing the thermostat wires.
Furthermore, a small level will guarantee the thermostat base plate is mounted straight. Pliers can assist with wire manipulation. A voltage tester is highly recommended to confirm power is off before handling wires. Finally, have a pen or marker handy for labeling wires, and a drill with appropriate bits if new mounting holes are needed.
Understanding Your Existing Thermostat Wiring
Before disconnecting anything, carefully document your current thermostat’s wiring! This is crucial for a successful T4 installation. Take clear, well-lit photos of the wiring connections. Note the color of each wire and the terminal it’s connected to.
Common wire designations include R (power), W (heating), Y (cooling), G (fan), and C (common – often blue). However, wire colors can vary, so relying solely on color is unreliable. The ‘C’ wire is particularly important for the T4’s consistent power. If you lack a ‘C’ wire, alternative power solutions may be needed. Accurate wiring identification prevents system malfunctions.
Identifying Common Wire Colors & Functions (R, W, Y, G, C)
Let’s decode those wires! Typically, R is red and provides 24V power. W, often white, activates the heating system. Y, usually yellow, controls cooling. G, frequently green, operates the fan. The C wire, commonly blue, is the common wire – essential for consistent power to the T4.
However, wire colors aren’t standardized! A white wire might be used for cooling in some systems. Always verify the terminal connection, not just the color. Incorrect wiring can damage your HVAC system. Refer to your existing thermostat’s manual if available. When in doubt, consult a qualified HVAC technician before proceeding with the installation.
Compatibility Check: Systems Supported by T4
Is your system compatible? The Honeywell T4 thermostat broadly supports most 24V heating and cooling systems, including forced air, heat pump (without auxiliary heat control), and radiant heat. It’s designed for single-stage and multi-stage heating/cooling setups.
However, the T4 doesn’t support line voltage systems (110V/240V), or systems requiring a proprietary communication protocol. Millivolt systems are also incompatible. If you have a zoned system, confirm compatibility with your zone control panel. Before installation, carefully assess your existing system. If unsure, consult an HVAC professional to avoid potential issues and ensure a successful installation.
Powering Down Your HVAC System
Safety First! Before commencing any wiring work, completely disconnect power to your HVAC system at the breaker box. Do not rely solely on the thermostat’s power switch. Locate the dedicated breaker for your furnace and air conditioner – typically labeled “Furnace” or “HVAC”.
Confirm Power Off: After switching the breaker to the “OFF” position, verify power is indeed off. Use a non-contact voltage tester on the wires at your old thermostat. A lack of voltage confirms a safe working environment. This crucial step prevents electrical shock and potential damage to your new T4 thermostat and existing HVAC components.
Removing Your Old Thermostat
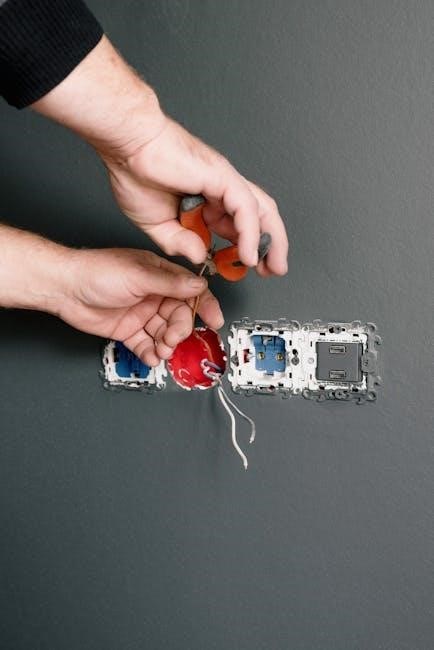
Careful Disconnection: Once the HVAC system is powered down and verified safe, gently remove the cover of your existing thermostat. Important: Before disconnecting any wires, carefully label each wire with the provided wire labels, corresponding to the terminal letter on the old thermostat baseplate (R, W, Y, G, C, etc;).
Photograph for Reference: Taking a clear photograph of the existing wiring configuration is highly recommended; This serves as a valuable backup reference during the T4 installation process. Loosen the screws securing the wires and carefully detach each wire from its terminal. Once all wires are disconnected, remove the old thermostat baseplate from the wall.
Mounting the T4 Thermostat Base Plate
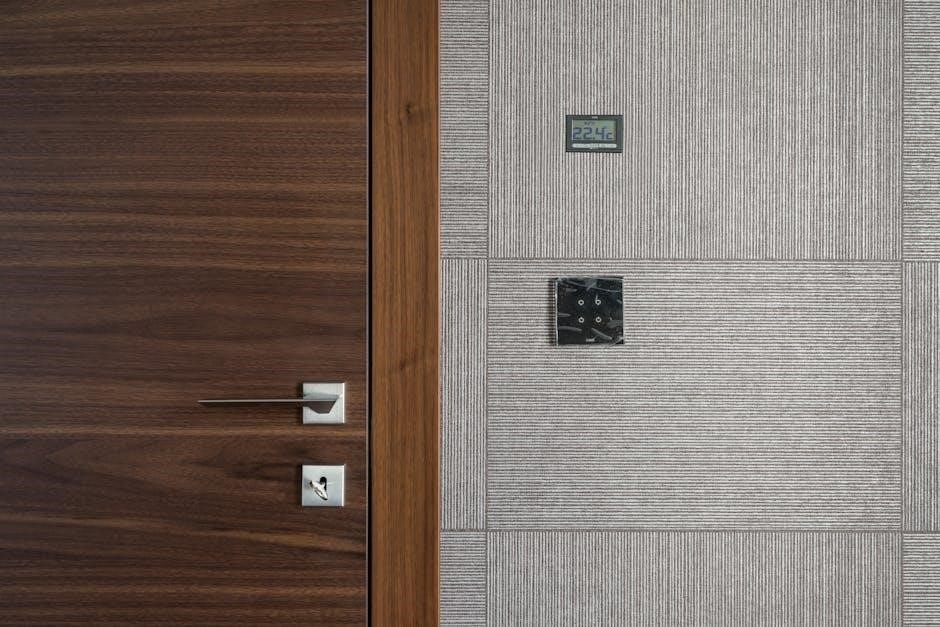
Positioning is Key: Select a location for the T4 base plate that is level and avoids direct sunlight or drafts. Use the included mounting screws and wall anchors (if necessary) to securely attach the base plate to the wall. Ensure Leveling: A small bubble level is helpful to guarantee the base plate is perfectly horizontal for proper display alignment.
Wire Access: Confirm sufficient space behind the base plate exists to comfortably accommodate all the connected thermostat wires. Gently feed the labeled wires through the opening in the base plate. Double-check that the base plate is firmly mounted before proceeding to the wiring stage, preventing instability during installation.
Wiring the T4 Thermostat
Careful Connections: With the base plate mounted, carefully connect each wire to the corresponding terminal on the T4 thermostat base. Refer to the wiring diagram and the labels you applied during the old thermostat removal. Secure the Wires: Ensure each wire is firmly inserted into its terminal, providing a solid electrical connection. A loose connection can cause system malfunctions.
Double-Check: Before proceeding, meticulously review all wire connections against your system’s wiring configuration. Incorrect wiring can damage your HVAC equipment. Gently tug on each wire to confirm it’s securely held in place.
Step-by-Step Wiring Instructions for Common HVAC Systems
Conventional Systems (R, W, Y, G): Connect the Red (R) wire to ‘Rh’ or ‘Rc’ (jumper if needed). White (W) connects to ‘W1’. Yellow (Y) goes to ‘Y1’, and Green (G) to ‘G’. Heat Pump Systems (R, Y, G, O/B): Red (R) to ‘Rh/Rc’. Yellow (Y) to ‘Y1’. Green (G) to ‘G’. Orange (O) or Blue (B) to ‘O/B’.
C-Wire Required: If your system has a Common (C) wire, connect it to ‘C’. This provides constant power. Without a C-Wire: A C-wire adapter may be necessary – consult a professional. Always verify compatibility before wiring.
Using the Wire Labels Provided
Essential Step: Before disconnecting any wires from your old thermostat, carefully apply the provided wire labels. Match each wire’s color to the corresponding terminal designation (R, W, Y, G, C, etc.).
Accurate Identification: Wrap the label tightly around the wire for secure attachment. This prevents confusion during the T4 installation process. Double-check each label against your old thermostat’s wiring diagram.
Organization is Key: Labeled wires streamline the connection to the T4 base plate, minimizing errors. If unsure about a wire’s function, consult a qualified HVAC technician before proceeding. Proper labeling ensures a successful and safe installation.

Attaching the T4 Thermostat Display
Gentle Connection: Once the base plate is securely mounted and all wiring is correctly connected, carefully align the T4 thermostat display with the base. Ensure it’s oriented correctly for optimal viewing.
Secure Mounting: Gently press the display onto the base plate until you hear a distinct click. This confirms a secure connection. Avoid excessive force, which could damage the display or the base plate.
Visual Confirmation: Verify that the display is firmly attached and sits flush against the wall. A loose connection can cause intermittent power or display issues. Now, proceed to the initial power-up and system check.
Initial Power-Up and System Check
Restoring Power: After attaching the display, restore power to your HVAC system at the breaker box. The T4 thermostat display should illuminate, initiating the startup sequence. Allow a few moments for the system to boot up completely.
System Response: Observe the thermostat display. It should cycle through a self-test and then present the main screen. Test both heating and cooling modes to confirm proper operation. Listen for the HVAC system engaging in both functions.
Verification: Verify that the fan operates correctly in both auto and on modes. If any issues arise, immediately power down the system and re-check all wiring connections.
T4 Thermostat Basic Programming
Navigating the Interface: The T4 thermostat utilizes a user-friendly touchscreen interface for programming. Access the programming menu by tapping the ‘Menu’ icon, then selecting ‘Schedule.’ You’ll be presented with options for creating daily or weekly schedules.
Setting Time & Date: Before scheduling, ensure the correct date and time are set. Navigate to ‘Settings,’ then ‘Date/Time.’ Adjust as needed. Accurate timekeeping is crucial for automated scheduling.
Creating Schedules: Define different temperature settings for ‘Wake,’ ‘Leave,’ ‘Return,’ and ‘Sleep’ periods. Customize these periods to match your daily routine for optimal comfort and energy savings.
Setting the Date and Time
Accessing the Settings: To begin, tap the ‘Menu’ icon on the T4 thermostat’s touchscreen. From the main menu, select ‘Settings.’ Within the Settings menu, locate and select ‘Date/Time.’ This will open the date and time adjustment screen.
Adjusting the Date: Use the up and down arrows to adjust the month, day, and year. Confirm each selection by tapping ‘Next’ or ‘Confirm.’ Ensure the date is accurate for proper scheduling functionality.
Adjusting the Time: Similarly, adjust the hour and minute using the arrow buttons. Select ‘AM’ or ‘PM’ as appropriate. Accurate time is vital for the thermostat’s automated features to operate correctly.
Creating a Basic Heating/Cooling Schedule
Accessing Scheduling: From the main menu, select ‘Schedule.’ The T4 offers pre-set schedules, or you can create a custom one. To start, choose ‘Custom Schedule.’ You’ll be presented with options for each day of the week.
Setting Time Periods: For each day, define time periods like ‘Wake,’ ‘Leave,’ ‘Return,’ and ‘Sleep.’ Assign a desired temperature for heating and cooling during each period. Use the touchscreen to easily adjust times and temperatures.
Copying Schedules: To save time, copy a schedule from one day to others. This is useful if your weekday schedule is consistent. Review the entire schedule before saving to ensure accuracy and comfort.
Wi-Fi Connection and Mobile App Setup
Initiating Wi-Fi Setup: On the T4 thermostat, navigate to the ‘Network’ or ‘Wi-Fi’ settings within the menu. Select ‘Connect to Wi-Fi’ and the thermostat will scan for available networks. Choose your home network from the list.
App Download & Account Creation: Download the Honeywell Home app from the App Store (iOS) or Google Play Store (Android). Create an account or log in if you already have one. Follow the in-app instructions to add your T4 thermostat.
Thermostat Pairing: The app will guide you through pairing the thermostat, often involving entering a unique code displayed on the T4’s screen. Once paired, you can control your HVAC system remotely!
Advanced Features & Settings
Customizing Your Comfort: The T4 offers several advanced settings to optimize your home’s climate control. Explore options like ‘Smart Recovery’ which learns how long it takes to reach your desired temperature.
Geofencing: Enable geofencing within the Honeywell Home app to automatically adjust the temperature based on your location. Set a radius around your home; when you leave, it switches to away mode, saving energy!
Smart Home Integration: Seamlessly integrate your T4 with popular smart home platforms like Amazon Alexa or Google Assistant. Control your thermostat with voice commands for ultimate convenience. Explore further customization within the app!
Geofencing Configuration
Location-Based Comfort: Geofencing utilizes your smartphone’s location to automate temperature adjustments. Within the Honeywell Home app, navigate to the Geofencing settings. Define a virtual perimeter – a geofence – around your home.
Setting the Radius: Adjust the geofence radius to suit your needs; a smaller radius offers quicker responses, while a larger one provides a buffer. When your phone enters the geofence, the T4 will switch to your ‘Home’ temperature setting.
Away Mode Activation: Conversely, when your phone leaves the geofence, the thermostat automatically enters ‘Away’ mode, conserving energy. Multiple users can be added for comprehensive coverage!
Smart Home Integration (Alexa, Google Assistant)
Voice Control Convenience: Enhance your T4 experience with seamless integration with Amazon Alexa or Google Assistant. Begin by enabling the Honeywell Home skill within the Alexa or Google Home app. Link your Honeywell Home account to authorize access.
Voice Commands: Once linked, control your thermostat using simple voice commands. For example, say “Alexa, set the thermostat to 72 degrees” or “Hey Google, what’s the temperature?”
Routine Creation: Further automate your comfort by creating routines. Integrate the T4 with other smart home devices for a truly connected experience. Enjoy hands-free control and personalized comfort!
Troubleshooting Common Installation Issues
No Power to Thermostat: Verify the HVAC system’s breaker hasn’t tripped. Double-check all wiring connections at both the thermostat and the furnace/air handler. Ensure the ‘C’ wire (common wire) is securely connected – this is crucial for power.
Thermostat Doesn’t Control HVAC: Confirm correct wiring based on your system type (heat pump, forced air, etc.). Incorrect wiring is the most frequent cause. Revisit the wiring diagram and labels.
Wi-Fi Connection Problems: Ensure your Wi-Fi network is functioning correctly. Check the thermostat’s signal strength. Try restarting both the thermostat and your router. Consult the app for detailed troubleshooting steps.
Resetting the T4 Thermostat to Factory Defaults
Performing a Factory Reset: A factory reset erases all personalized settings, returning the T4 to its original, out-of-the-box state. This is useful for troubleshooting persistent issues or preparing the thermostat for a new user.
Reset Procedure: Navigate to the settings menu on the thermostat display. Locate the “Reset” or “Factory Defaults” option (the exact wording may vary slightly). Confirm your decision to reset – a warning message will appear.
Post-Reset Steps: After the reset completes, the thermostat will restart. You’ll need to re-establish your Wi-Fi connection and re-program your desired heating/cooling schedules. Remember to re-register the device in the mobile app.
Understanding Error Codes & Messages
Decoding System Alerts: The Honeywell T4 thermostat utilizes error codes and on-screen messages to communicate system issues. These alerts help diagnose problems with your HVAC system or the thermostat itself.
Common Error Indicators: A “C Wire Missing” message indicates insufficient power. “R” wire errors suggest a problem with the common power supply. “Y” errors often relate to cooling system malfunctions. Consult the full error code list within the thermostat’s settings menu or the Honeywell support website.
Troubleshooting Resources: Note the specific error code and refer to the online troubleshooting guide for detailed solutions. If the issue persists, contact a qualified HVAC technician for assistance.
Maintaining Your T4 Thermostat
Ensuring Optimal Performance: Regular maintenance extends the lifespan and accuracy of your Honeywell T4 thermostat. Dust accumulation can affect sensor readings, so gently clean the thermostat faceplate monthly with a soft, dry cloth.
Avoid Harsh Chemicals: Never use abrasive cleaners, solvents, or excessive moisture during cleaning. Periodically check the wiring connections at the baseplate to ensure they remain secure. Software updates, available through the mobile app, enhance functionality and address potential bugs.
Battery Considerations: If your system requires batteries, replace them annually or when a low-battery warning appears on the display.
Warranty Information & Support
Honeywell T4 Limited Warranty: Your Honeywell T4 thermostat is covered by a one-year limited warranty against defects in materials and workmanship from the date of purchase. This warranty does not cover damage caused by improper installation, misuse, or neglect.
Contacting Support: For warranty claims or technical assistance, please visit our website at HoneywellHome.com/support or call our dedicated support line at 1-800-468-1513. Our knowledgeable support team is available to assist you with any questions or concerns.
Online Resources: Access a wealth of helpful resources, including FAQs, troubleshooting guides, and video tutorials, on our support website.
Frequently Asked Questions (FAQ)
Q: Can I install the T4 myself? A: Yes, if you are comfortable working with low-voltage wiring and follow the instructions carefully. However, professional installation is recommended if you are unsure;
Q: What if my system doesn’t have a C-wire? A: The T4 may require a C-wire adapter, sold separately, for systems lacking one. Check compatibility on our website.

Q: Will the T4 work with my existing smart home system? A: The T4 is compatible with Alexa and Google Assistant. See the ‘Smart Home Integration’ section for details.
Q: How do I reset the thermostat? A: Refer to the ‘Resetting the T4 Thermostat’ section for detailed instructions.